Wednesday, August 25, 2010

Thanks A Melon Card

I dusted off my Cricut and the "Just Because Cards" cartridge for this card.

I started with an 4.25" x 5.5" A2 base made from kraft cardstock from Papertrey Ink. If you have never used this brand of cardstock, it is super thick and sturdy and awesome for card bases.

All cuts are from the card. (page 55 of the handbook) I cut the red gingham shape at 4" as well as all layers of the watermelon. I cut the words at 3.75". All papers, except the base, are My Mind's Eye, and the edges were inked with Ranger's Distress Ink - Walnut Stain.

It was very simple, but I think it turned out pretty cute.

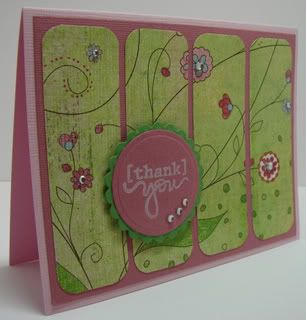
Thank You Card


This was a SUPER simple card!! I started with a light pink A2 card base (5.5" x 4.25") and added a darker pink layer that was 5.25" x 4". I added 4 strips of patterned paper from the Basic Grey "Phoebe" line about 1 3/16" wide and 3.75" long that I used a corner rounder on. The "thank you" is a Studio G stamp stamped with Stampin Up's Whisper White Craft Ink. I used Nestabilities in my Cuttlebug for the circle and scalloped circle. A few rhinestones finish it off.

I told you it was simple! :) I use this layout a lot when I need a quick and easy card.


Tuesday, November 10, 2009

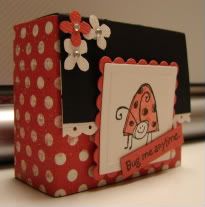
Ladybug Ghirardelli Box

Who loves chocolate? *jumping up and down* ME! I do!!

This little box holds 4 Ghirardelli chocolate squares. You would never know what yummy goodness it hold just by looking at it.

These little guys are so easy to make! You can get the directions here: http://www.splitcoaststampers.com/resources/tutorials/ghirardellibox/

My box was made from black Bazzill cardstock and covered with red polka dot paper from the My Mind's Eye Complete Boy stack. (I don't think I've mentioned lately how much I LOVE MME paper! LOL) The ladybug and sentiment are from Stampin' Up's "Very Punny" set and the ladybug was colored with a watercolor pencil. The flowers were made with a Martha Stewart hydrangea punch and the rhinestones are 2mm nail gems I got off eBay. The square and scalloped square were cut using Nestabilities dies in the Cuttlebug, and the white trim was made from the EK Success Dotted Scallop border punch.

And that's all there is to making a cute little chocolate box! :)

Tuesday, November 3, 2009

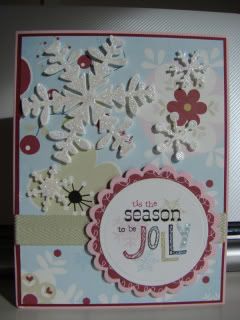
Jolly Christmas Card

I feel like I cheated with this card!

The sentiment and pattern papers were downloaded and printed from
http://www.pinkpetticoat.co.uk/. They are from their "Fairy Lights" collection. I used my Nestabilities in the Cuttlebug to cut the circles and scallops. The snowflakes are from two Cuttlebug dies, and they are covered with Star Dust Stickles and adhered with pop dots for dimension. The "jolly" in the sentiment was also made glittery by going over the letters with a Sakura Quickie Glue pen and sprinkling with loose glitter. The light green twill ribbon in from Martha Stewart.

Everyone uses pastel colors for Christmas cards, right?

Monday, October 19, 2009

Lunch Box Tin .cut file


The Provo Craft top loading tin - 20-7014

If anyone has altered a tin like this, you know what a pain in the you-know-what it can be!! Well, no more! I have created a .cut file with the Cricut Design Studio software to make altering these tins a breeze! No more tracing and trying to make your own template!

The file uses the George cartridge and has a page for the top, back, and front with the latch.

After you cut out the top piece, you will need to use scissors or a craft knife and cut between the two "ovals" so you can slip it over the handle. It shouldn't show *that* much after your paper is glued on.

You will want to adhere the back piece on before the front piece. They are made to overlap a bit, but the front pieces should end up just about on the center of the side. By putting the front piece on second you will have a much more symmetrical seam. (Being a Virgo, I love symmetry! LOL)

You can download the file HERE. (file has been updated for a 6x12 mat!)

I hope this helps someone with their tin-altering frustration!! If you end up using it, please let me know how it worked for you!

**UPDATE 3/18/11** If the file link doesn't work for you , please let me know. I had to upload it to a new host. :)

Thursday, October 1, 2009

Challenge Card

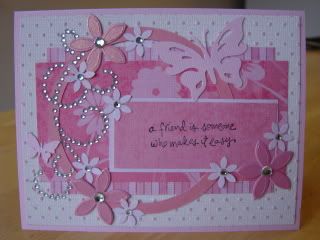
I made this card as part of a challenge over at www.fctsc.com. We were given a sketch and this is what I came up with.

The card measures 5.5" x 4.25" and the base is Bazzill. The dotted background is Core'dinations cardstock embossed with the Swiss Dots Cuttlebug folder. The striped and flowered pink papers are from M's and are made by g.c.d studios. The circle was cut at 3.5" with my Cricut using the George cartridge, and the butterflies were cut using Indie Art - the solid one at .5" and the bigger one at 1.25". The butterflies were cut from pink Bazzill and the circle is the reverse of the patterned paper, as are the rectangles for the stamped saying and the smaller flowers.

The stamped saying is from Stampin Up's "Simply Said" set. The larger flowers are Bride's table confetti from M's and the smaller ones were made using a punch. The larger rhinestones are 3 and 5mm from J's made by Darice, and the smaller ones are 2mm nail gems from eBay, all glued on individually. (Yeah, it took a while and yeah, I know they aren't straight! LOL)

Wednesday, April 15, 2009

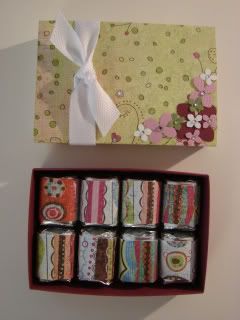
Nugget Box


Here is a little Nugget box that I made very quickly the other day. The cardstock is Bazzill and the patterned papers are from the Basic Grey "Phoebe" line. The flowers are hydrangea punches from Martha Stewart, and the twill ribbon is also Martha Stewart. The "bigger" rhinestones are 3mm Darice from J's and the smaller ones are 2mm nail gems I got off eBay.

The directions to make the box came from here:
http://www.scor-pal.com/basics/index_files/Page406.htm