Showing posts with label Stampin Up. Show all posts

Sunday, September 19, 2010

Embossed Flowers Thank You Card

If you tilt your head just a bit, the card will be straight! LOL OK, so my picture taking ability stinks.

I can't even begin to express how simple and easy this card was!! The "white" embossed piece is Core'dinations Whitewash cardstock with a lavender core. I embossed it with the "Elegant Bouquet" embossing folder from Stampin Up in my Cuttlebug. I sanded the embossing until the core color showed.

The sentiment is from Papertrey Ink's "Signature Greetings" and was stamped in purple ink and heat embossed, then cut using a Nestabilities die in my Cuttlebug. A few clear rhinestones in the center of the flowers finish it off.

You can use this base for soooo many different kinds of cards - just change the colors and sentiment to suit your occassion!

Wednesday, August 25, 2010

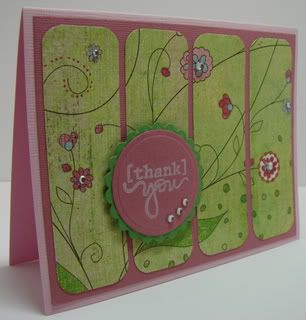
Thank You Card


This was a SUPER simple card!! I started with a light pink A2 card base (5.5" x 4.25") and added a darker pink layer that was 5.25" x 4". I added 4 strips of patterned paper from the Basic Grey "Phoebe" line about 1 3/16" wide and 3.75" long that I used a corner rounder on. The "thank you" is a Studio G stamp stamped with Stampin Up's Whisper White Craft Ink. I used Nestabilities in my Cuttlebug for the circle and scalloped circle. A few rhinestones finish it off.

I told you it was simple! :) I use this layout a lot when I need a quick and easy card.


Tuesday, November 10, 2009

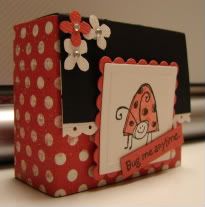
Ladybug Ghirardelli Box

Who loves chocolate? *jumping up and down* ME! I do!!

This little box holds 4 Ghirardelli chocolate squares. You would never know what yummy goodness it hold just by looking at it.

These little guys are so easy to make! You can get the directions here: http://www.splitcoaststampers.com/resources/tutorials/ghirardellibox/

My box was made from black Bazzill cardstock and covered with red polka dot paper from the My Mind's Eye Complete Boy stack. (I don't think I've mentioned lately how much I LOVE MME paper! LOL) The ladybug and sentiment are from Stampin' Up's "Very Punny" set and the ladybug was colored with a watercolor pencil. The flowers were made with a Martha Stewart hydrangea punch and the rhinestones are 2mm nail gems I got off eBay. The square and scalloped square were cut using Nestabilities dies in the Cuttlebug, and the white trim was made from the EK Success Dotted Scallop border punch.

And that's all there is to making a cute little chocolate box! :)

Thursday, October 1, 2009

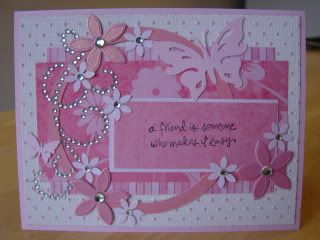
Challenge Card

I made this card as part of a challenge over at www.fctsc.com. We were given a sketch and this is what I came up with.

The card measures 5.5" x 4.25" and the base is Bazzill. The dotted background is Core'dinations cardstock embossed with the Swiss Dots Cuttlebug folder. The striped and flowered pink papers are from M's and are made by g.c.d studios. The circle was cut at 3.5" with my Cricut using the George cartridge, and the butterflies were cut using Indie Art - the solid one at .5" and the bigger one at 1.25". The butterflies were cut from pink Bazzill and the circle is the reverse of the patterned paper, as are the rectangles for the stamped saying and the smaller flowers.

The stamped saying is from Stampin Up's "Simply Said" set. The larger flowers are Bride's table confetti from M's and the smaller ones were made using a punch. The larger rhinestones are 3 and 5mm from J's made by Darice, and the smaller ones are 2mm nail gems from eBay, all glued on individually. (Yeah, it took a while and yeah, I know they aren't straight! LOL)

Friday, October 24, 2008

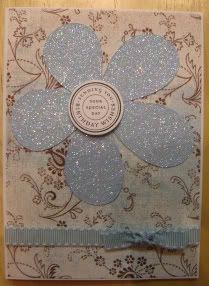
Glitter Flower Birthday Card

Here is another super easy card I made for the Cards For Soldiers.  Again, standard A2 size.  The patterned paper is from a My Mind's Eye stack I got at Costco last year.  The flower was cut out of light blue Bazzill at 3.5" (blackout) using my Cricut machine with the beloved George cart.  I used Mod Podge applied with one of those foam brushes to cover the flower and then covered it with Crystal Ultrafine Transparent glitter from Art Institute.  (I would normally use my Xyron when applying loose glitter, but I was making 24 flowers total and was too cheap to buy more refills!  LOL)  The stamp is from the Stampin' Up set "Circle of Friendship" stamped on white cardstock and punched out with a circle punch.  The ribbon is from M's.  I used a pop dot to attach the sentiment to the flower.  Can't get much simpler than this!!

"Friends" Card

Alrighty folks, you are in for a rare treat today!  Here is a card I made a few months ago for the Cards For Soldiers on the Cricut MB.  What's rare about this card?  IT WASN'T SCRAPLIFTED!  *GASP*  I know, I know - what is this world coming to??

Again, this card is a standard A2 size - 5.5" x 4.25".  The printed paper is from M's or J's probably (who can remember?) and the cardstock is Bazzill.  I used my Cricut and my beloved George cart to cut out a 4.25" lavender oval, a 3.75" pink oval, a 3.75" transparency oval, and a 3.75" silhouette green oval.  The friends stamp is from the Stampin' Up set "Love Matters" and I stamped it on the transparency with black Staz-On ink.  I used Stickles glitter glue to color it in from behind.  Super easy!!

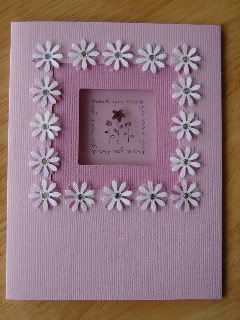
Daisy Window Card

So here is a thank you card I made for a swap a few months ago.  I lifted the idea from the book "New Concepts in Paper Quilling" by Marie Browning.  The only difference is that hers was blue instead of pink and had a picture of a child instead of a stamp.  Other than that, it's exactly the same.

The card itself is a standard A2 size - 4.25" x 5.5".  The base had a hand cut (read that as pain in the butt!!) 2.5" window and the inner piece has a 1.5" window.  The stamp is from the Stampin' Up set "Figures of Speech".  I stamped it on a transparency sheet with black Staz-On ink and "colored" it in on the back side with Stickles glitter glue.  The daisies are a small punch with 3mm rhinestones in the middle.

This card was a pain in the rear to make due to having to cut out the window openings with a craft knife.  My dear friend Angie has made life simpler for me and has created a .cut file for this card in the Cricut Design Studio.  You can check it out HERE.  Thanks Angie!!